MovieJack – download your favorite videos from the internet to your PC! At the moment MovieJack supports YouTube, Watchbox, Dailymotion, Vevo and Vimeo.
Package content
The product package consist of the MovieJack software including electronic help file and license key. MovieJack is also available as a CD copy with printed help.
System requirements
A functioning Windows operating system is required to install this software. Concerning the hardware as a rule of thumb: the more powerful your system is, the better the software will work. You require at least:
- Windows 7, Windows 8, Windows 10 (either 32- or 64-bit)
- at least 1 Gigabyte RAM
- .NET 4 Framework (will be installed automatically if needed)
- A connection to the internet is required to activate the software!
Support
Please contact our support if unexpected problems occur while using MovieJack. You can reach our Support-Center through our contact form one our website. Important! To help you as effectively as possible we require the following information:
- Software name (MovieJack) and version number.
- The designation of the used operating system and possibly installed service packs.
- A short error description as well as how frequency it occurs ( sporadic, regular).
Installation
To make the entry as easy as possible this chapter lists all the important information for installing MovieJack on your PC. To install MovieJack proceed as following:
- Save all your current data and close all open programs.
- If you bought MovieJack on CD please insert the disc. The setup wizard will start automatically; if not, please open your CD-ROM drive through ‘My Computer’ on your Desktop and execute the file setup per double click (e.g. D:\Setup.exe)
- If you bought the download version of MovieJack, please start the downloaded file per double click.
If you have not yet downloaded the file, you can to it on our webpage. Under options you can choose your desired installation path. You can also choose if you want to create a desktop shortcut after the installation is complete. To save these settings click on ‘OK’.
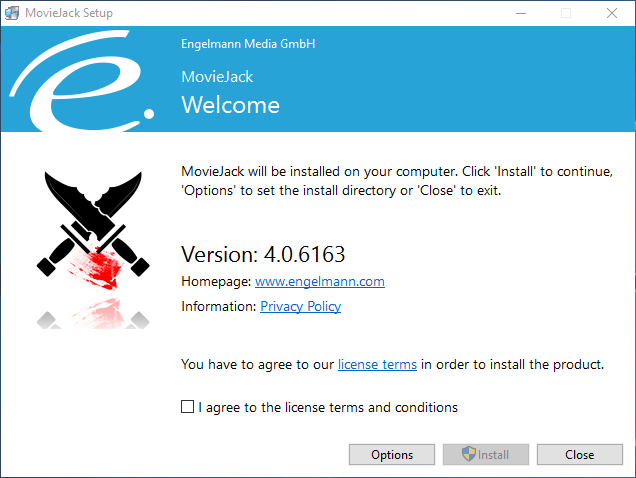
The setup wizard will guide you step-by-step through the installation. As usual the following procedure applies:
- Install: The ‘Install’ button will start the installation. Up to the point where you click on ‘Install’ no changes at you system will be made.
- Close: The ‘Close’ button interrupts the installation and cancels all previously changes made.
After successfully installing MovieJack you can start it with the following methods:
- Through the start menu: Click on ‘Start -> Programs -> Engelmann Software -> MovieJack.
- Through the desktop: Double click on the MovieJack icon on your Desktop (if you chose to create it during the setup).
- Through the quick start bar: Click on the MovieJack icon in the quick start bar. (Note: By default the quick start bar is not available after Windows 7.)
Important: Prior to the first program start please make sure that your PC has a stable internet connection so MovieJack can be licensed and activated .
Demo version
All features of MovieJack can be tested for two days. If MovieJack already convinces you please go to the chapter Licensing to receive more information.
Licensing
Concerning the licensing of the product there are two different possible scenarios: MovieJack convinced you within the demo period and you would like to buy it? Please click on: ‘Buy the full version’. You already own a valid license key for MovieJack? Please click on: ‘Enter license Key’.
If you want to purchase MovieJack please visit our homepage. At this point we would like to present you the easiest variant: Start your installed version of MovieJack and click on the ‘Buy now’ button.
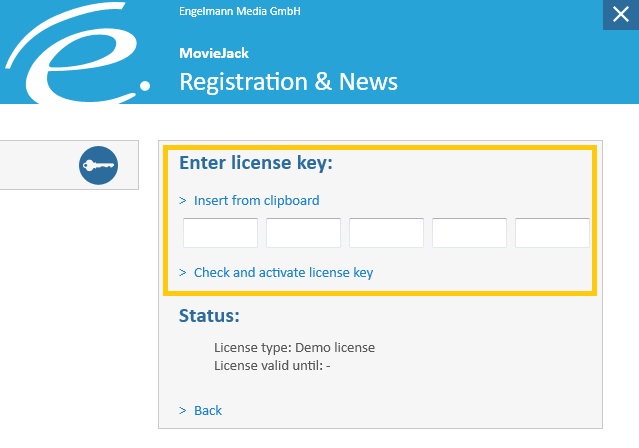
If you want to activate your MovieJack with your license number click on ‘Enter license key’. You either received the license number in an e-mail (in case of an online purchase) or it is enlosed in your physical copy. After entering the key click on ‘Check and activate license key’. A message will appear, telling you wether the entered license key was valid or not. One license key can only be activated at one PC.
Very importanbt: Please start our software with a right click and the option “Start as administrator” if you want to enter a license number.
Update
All registered users will receive free updates for one year according to the respective version number of their programs! To update your program click on ‘Update’ in the right corner of the menu bar. The update check is really fast and should be repeated regularly.
Tip: Enabling the option ‘Automatically check for updates’ inside the Settings menu will let MovieJack search for updates durch the start of the program.
Instructions
Welcome to the instructions of MovieJack. Here we will briefly explain hot to download videos and convert them to MP3 using MovieJack. The settings are there to customize the behavior of MovieJack to your needs. You can access it through ‘Settings’ in the menu bar.
General settings
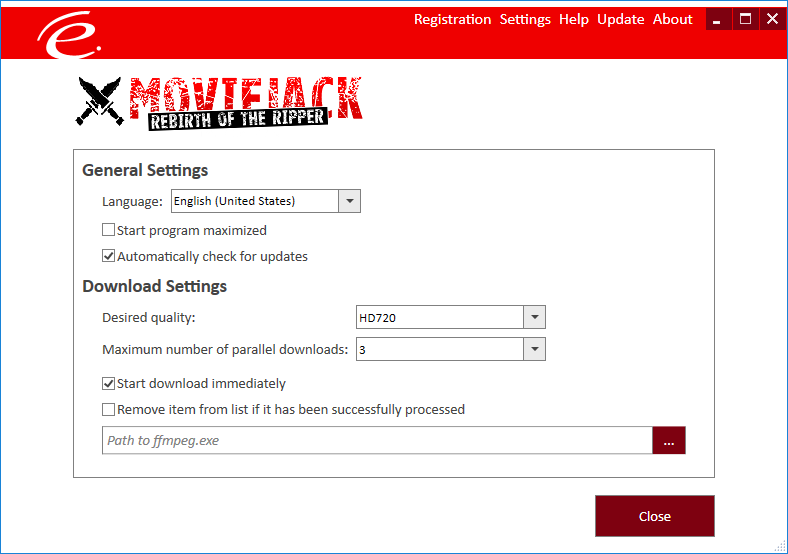
- Language: Here you can choose between five different languages for MovieJack (German, English, Hungaian, Italian and Polish).
- Start program maximized: MovieJack will start in fullscreen mode.
- Automatically check for updates: Activate this option to let MovieJack check for updates on startup. Note: During the update check no personal information will be transferred.
- Desired Quality: With the dropdown menu you can choose a desired quality with which the videos shall be downloaded. Please remember that higher qualities will also use more space on your hard drive.
- Maximum number of parallel downloads: Here you can choose how many videos shall be downloaded at once. Choose a value which fits your internet. After a number has been selected MovieJack has to be restarted.
- Start download immediately: After adding a URL to the list it will start downloading immediately
- Remove item from list if it has been successfully processed: Removes an entry after a successful download.
- Path to ffmpeg.exe: Click on the button with the three dots to choose a path to your ffmpeg.exe. It is necessary for downloading Youtube videos with qualities higher than 720p.
Add videos
Search for a video or a playlist on the video platform of your choice. E.g. open vevo.com. Search for “kongos come with me now” and open the first video. It will open the video on a new page. The URL is visible directly in your browser. URL is a short term for Uniform Resource Locator, colloquially termed a web address. E.g.:

Copy its URL into the input box ‘Add url’.
After that click on the plus sign to the right to add you video to the download list.
Alternatively you can click on the cloud icon to the left. This will add the video directly from your clipboard.
Select download path
Clicking on the button with the three dots to the right will let you choose a path, where the downloaded files will be saved. The disc icon to the left will open this path in the explorer.

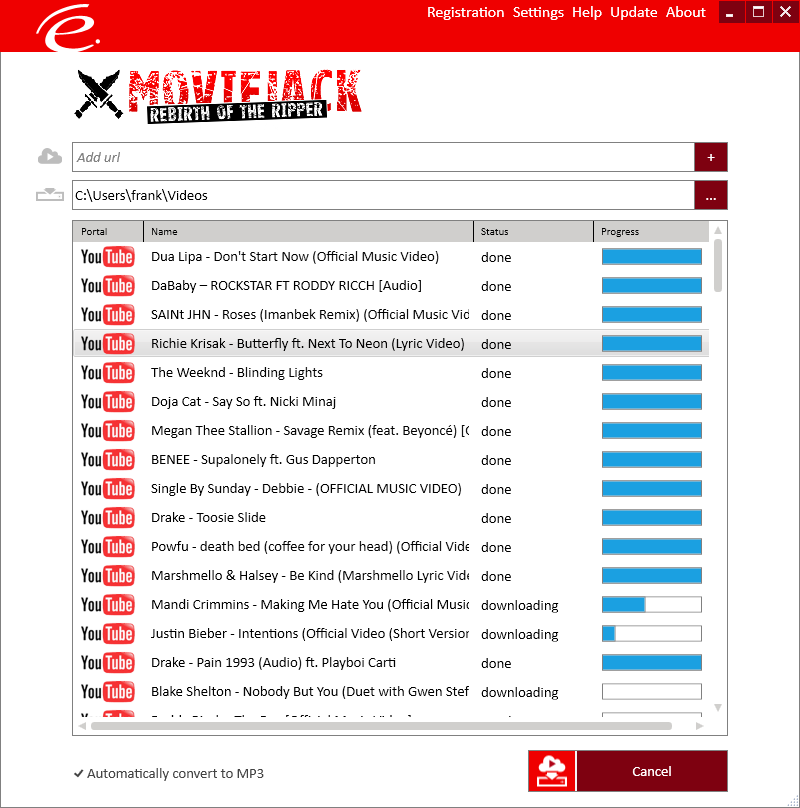
Download list
If you want more options like import and export you can right click inside the download list. This opens a context menu with the following options:
- Open with browser (Ctrl+O): Opens the selected video-URL in your standard browser
- Cleanup list (Ctrl+C): Removes completed URLs from the download list
- Retry (Ctrl+R): Retries downloading failed URLs
- Remove (Del): Removes the selected URL from your download list
- Remove All (Ctrl+Del): Removes all URLs inside the download list
- Import… (Ctrl+I): Imports a previously exported download list
- Export… (Ctrl+E): Exports the current download list into a seperate .mjdl file
Converting to MP3
It is also possible to directly convert your videos to MP3 after it has been downloaded. Just activate the ‘Automatically convert to MP3’ button to the lower left in the start menu.
Start download
After you added some video to the list and selecting the desired settings you can start with the download. To do so, click on the ‘Start’ button to the lower right of the start menu.
<- Back to: Overview of all manuals of products from Engelmann Software