
Those who travel a lot take many photos. And those who take many photos probably eventually lose track of where the photos were taken. Sure, the Brandenburg Gate was snapped in Berlin, but where was that church? And where were that lake and that beach? At least, that's often how I feel when I want to caption new photos or a video. But luckily, I own a camera that writes the GPS information directly into the images. With just a few clicks, I can find out the exact location where each photo was taken. And what's more: sometimes I simply have the respective shooting location displayed on a map / Google Maps for any number of photos. How this works and what possibilities there are, I'll reveal in this blog post.
Activating GPS Functions
A basic prerequisite for later assignment is GPS data. GPS stands for Global Positioning System. Signals originating from satellites are evaluated by a device - the camera. This determines one's own location. When you take a photo, a latitude and longitude are assigned to that image. By adding GPS data, the shooting location can be precisely determined even afterwards.
My camera, a Sony bridge camera, has this function. It is simply called: "GPS Data On / Off". And the cameras of most smartphones also support GPS. Here you sometimes have to search a bit in the settings, but so far I have found this function everywhere. On my current Android smartphone, the corresponding function is called "Enable geotagging". However, it only works if you have also activated GPS on your smartphone.
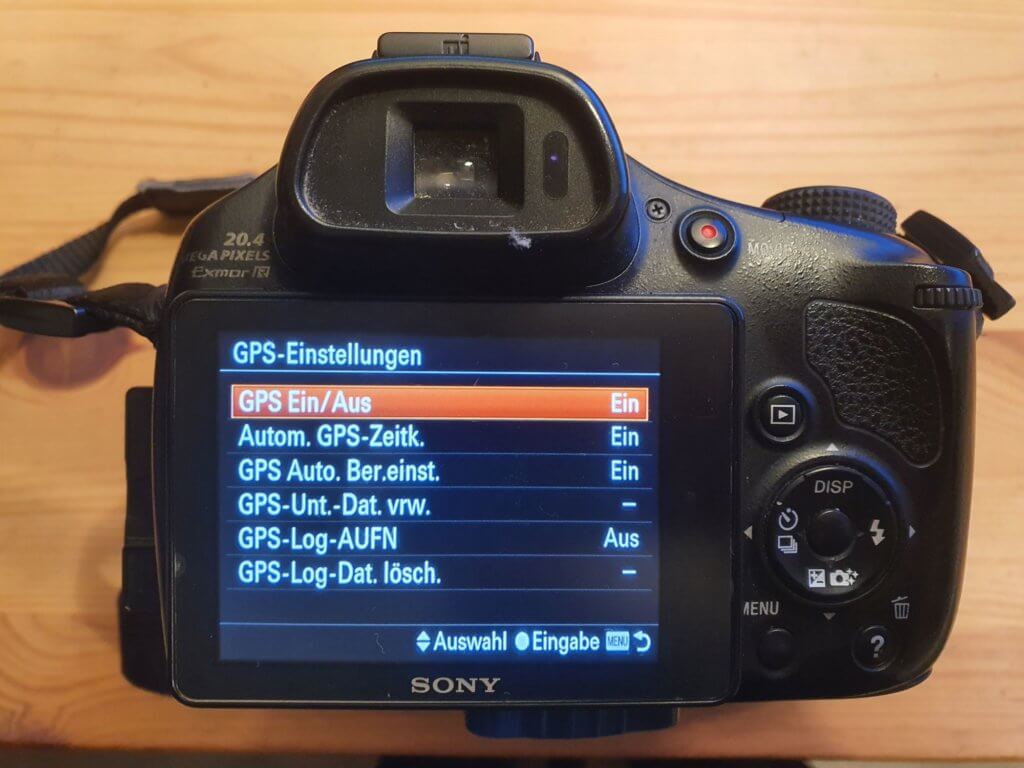
Only those who have a camera with a GPS function - or have GPS active on their smartphone - can save information such as latitude and longitude on the corresponding images. And that is the prerequisite for everything else.
How reliably is GPS data assigned to photos?
Before I show you the possibilities for reading out GPS data, a small note: Even with the GPS function activated, it can occasionally happen that the latitude and longitude information does not end up on the images. This is usually due to the following reasons:
- Images taken inside a building: The GPS connection is often lost here, at least with cameras the signal in buildings is often insufficient.
- Images taken shortly after turning on the camera: A camera usually needs some time after being turned on (between 1 second and one minute) to connect to enough satellites, especially if the environment is new. If you land on another continent, for example, a camera can easily take 5 minutes or longer to get full GPS reception. Each subsequent time will be significantly faster. With smartphones, which are continuously switched on, this phenomenon is rarer.
- Images in valleys, gorges, remote locations: On one or another trip, I have actually been to areas where I had no GPS reception. These places are rare, but they exist. They are usually very remote locations.
However, these limitations are very rare. And usually it is not even necessary for all the pictures you take to contain GPS data. If you have GPS on the pictures "BEFORE" the museum, it is certainly easy to correctly assign the pictures "IN" the museum without GPS.
How to find the shooting location of your pictures – five possibilities
You have activated the GPS function and now want to see the shooting location of your pictures displayed on a map? Then I will show you five ways to read out and display this data below.
1. Read out latitude and longitude from Exif data
Photo files contain much more than just the image. Just go to an image using your explorer and instead of opening it with a double click of the left mouse button, right-click it with the right mouse button. Now go to properties, then details. Here you will find the so-called Exif data. These are meta-information in digital images such as:
- Date taken
- Camera name and manufacturer
- Dimensions
- Horizontal and vertical resolution
- Exposure time
- Flash mode
- And much, much more
And if you scroll all the way down, you will also find GPS information in the Exif data. Latitude 39; 57; 22.032 and longitude 3; 12; 41.807 and even the altitude above sea level 175.7 is stored here.
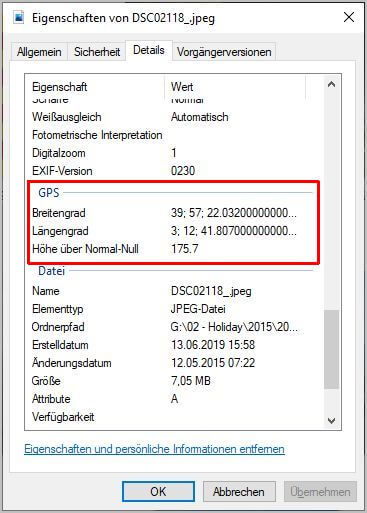
You have to type this information, reformat it a bit and put it into this format.
39°57'22.0"N 3°12'41.8"E
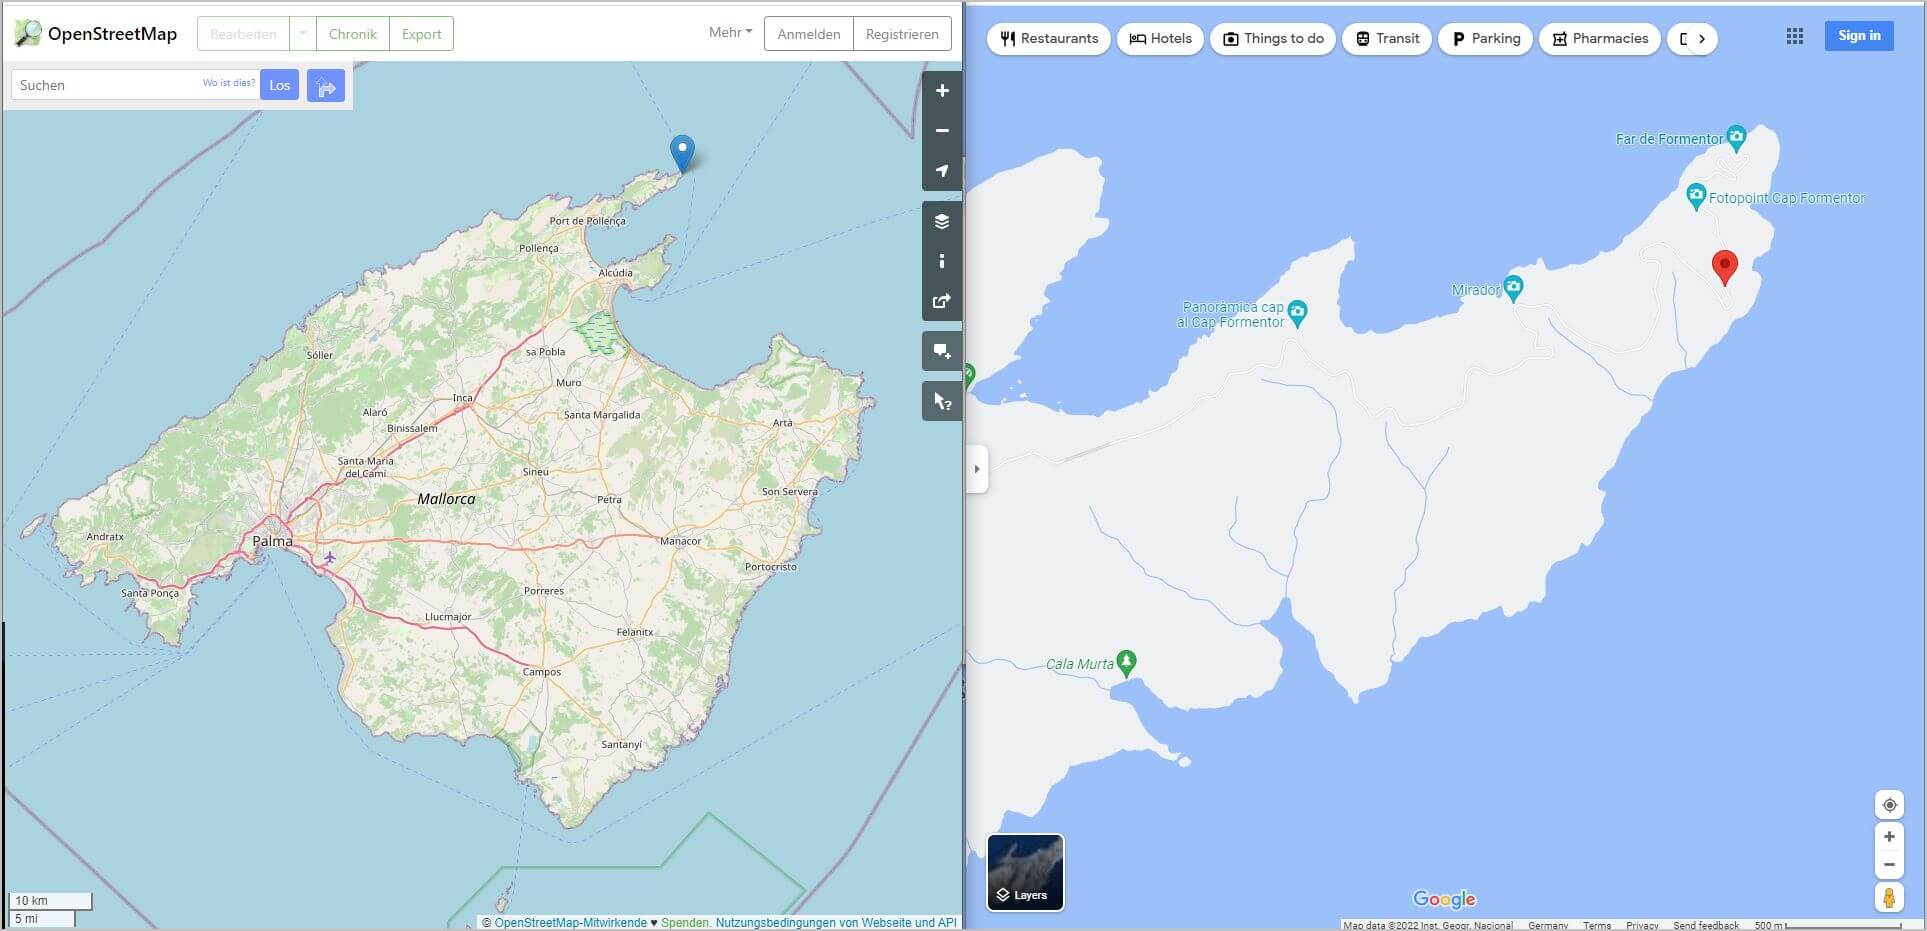
You can now copy this and enter it into Google Maps. Then you will see the shooting location of the picture on the Google map.
Cumbersome? Exactly! Luckily, it's much simpler.
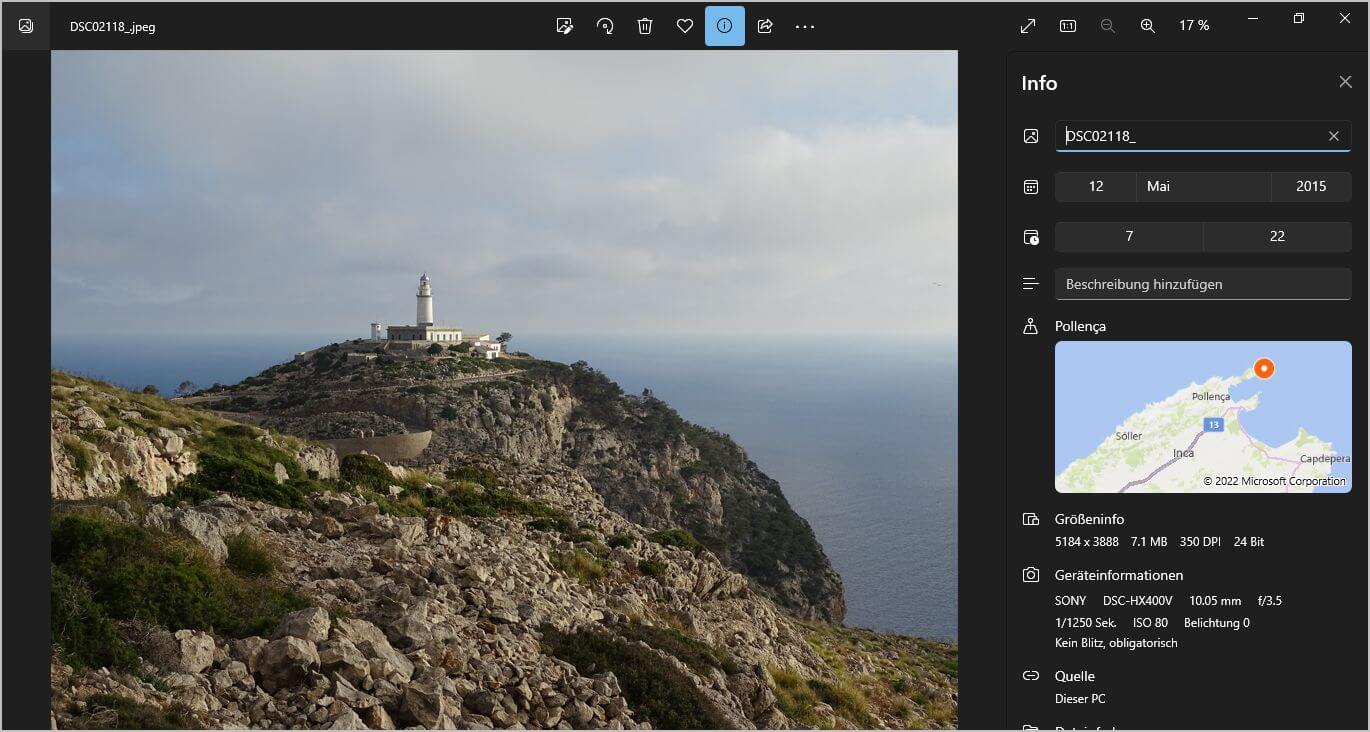
2. Open images using Microsoft Photos
If you use Windows 10 or Windows 11, the Microsoft Photos app is pre-installed on your system. Open your image with Microsoft Photos and then click on File Information (the icon next to the heart for favorites). Here, the most important meta-information already mentioned in point 1 is displayed. In addition, you will see a small map within the program. You can navigate and scroll within this map and thus see exactly where the picture was taken. Unfortunately, the map always remains in this "preview window" and you cannot display the shooting location for multiple pictures simultaneously on the map.
Cumbersome? Exactly! Luckily, it's simpler.
3. Using Exif files and IrfanView to put photos on Google Maps
IrfanView is a free photo program that I regularly use in addition to Photomizer. Even if the optimization filters in IrfanView are not entirely convincing, there is a simple way here to display the GPS data stored in the image directly on Google Maps. And this is how it works:
- Open photo with IrfanView
- Click on Image, then Information (Alternatively, click on the image with the mouse and then just the "I" key)
- Now click on Exif data*
- Now click on Show in Google Maps / Google Earth / Open Street - and the photos will be displayed
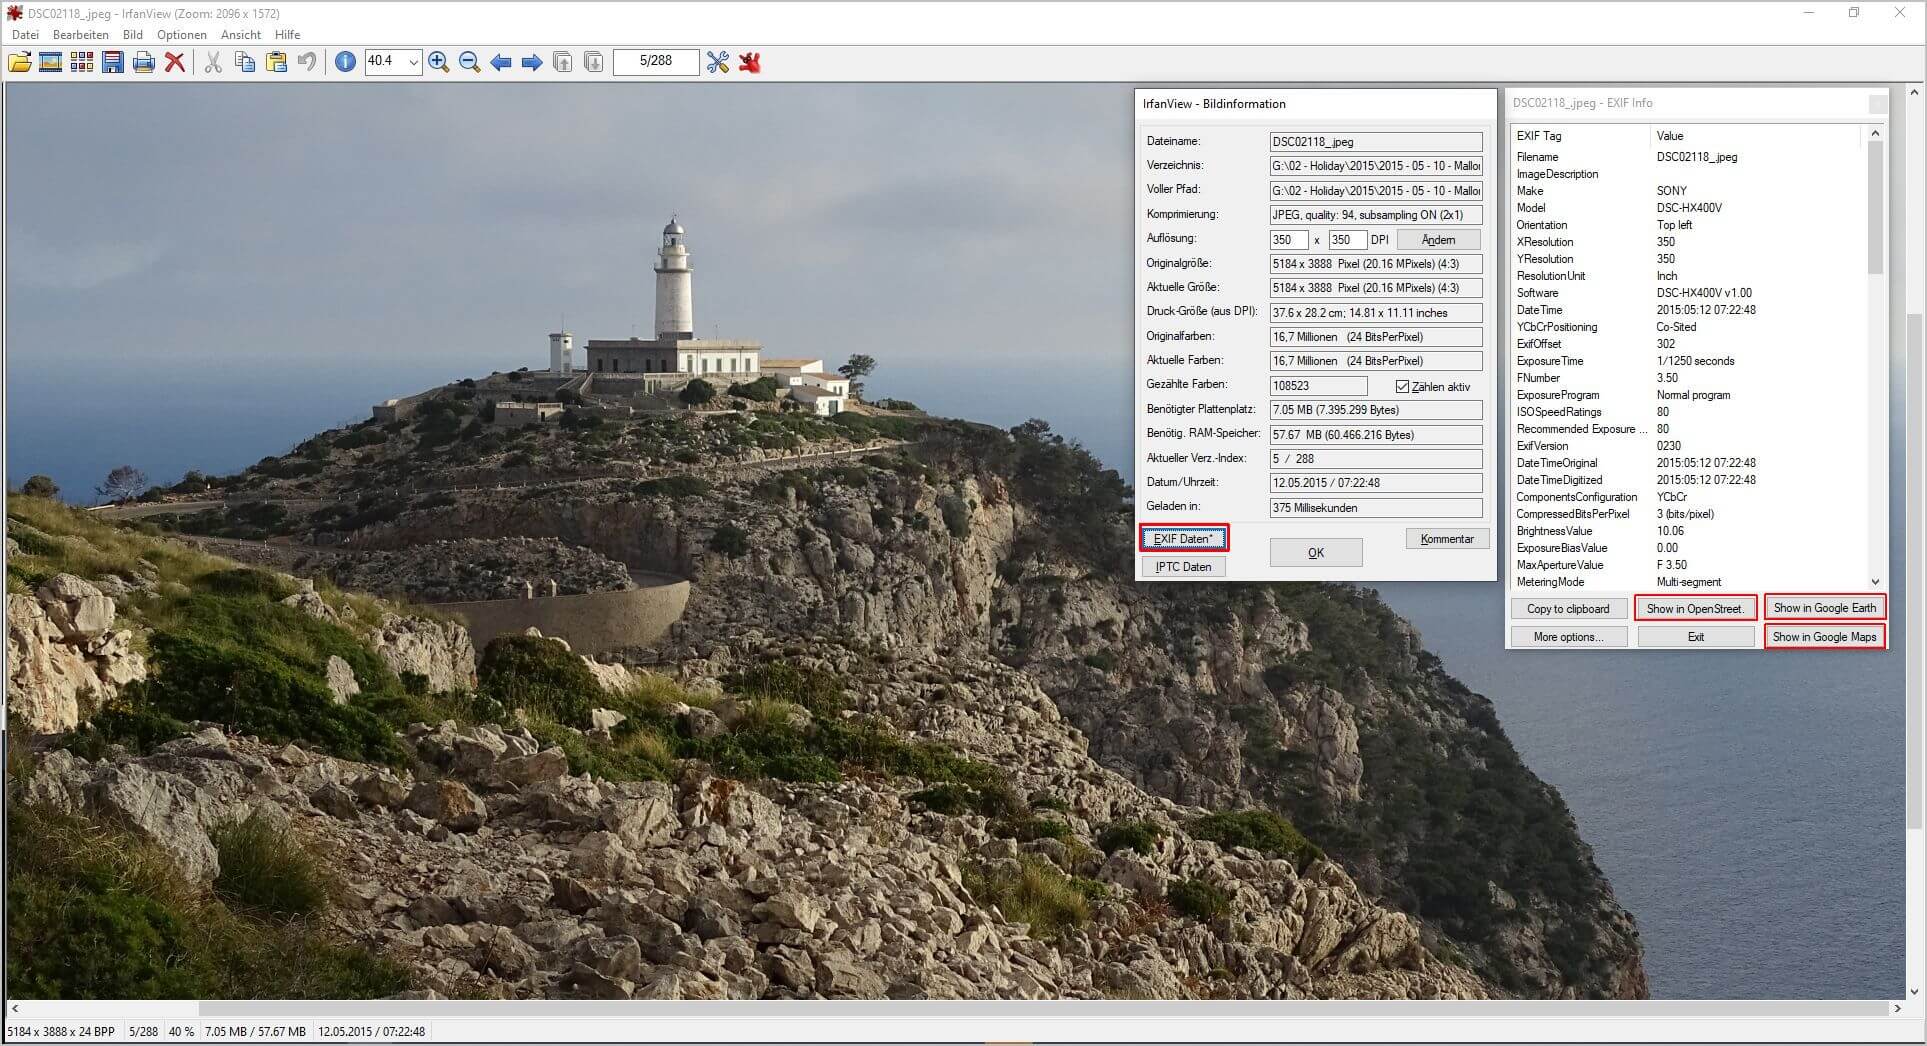
A new browser window then opens, and here I see the selected service and the exact spot where I took the photo. Here I also have a large and clear map. However, only one location is displayed on this map.
Cumbersome? Not really, but there are also ways to display several recording locations simultaneously and on a single map.
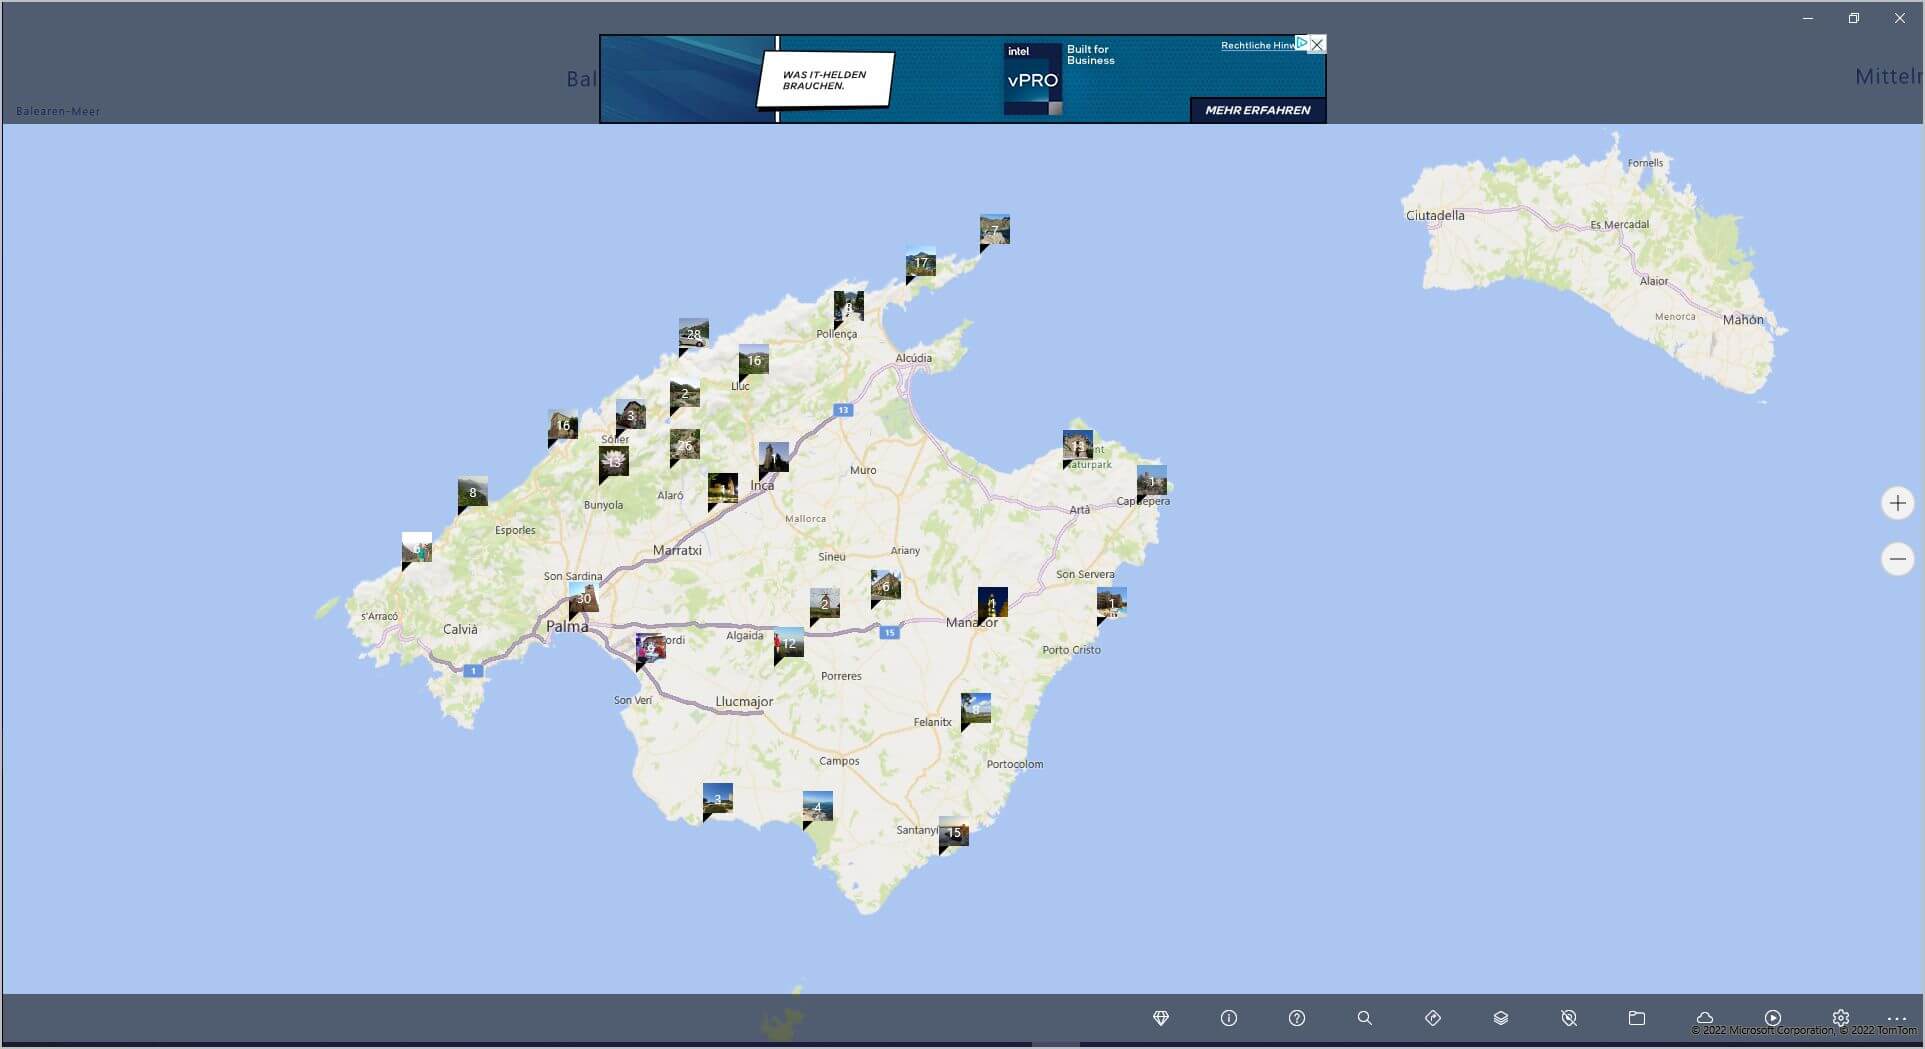
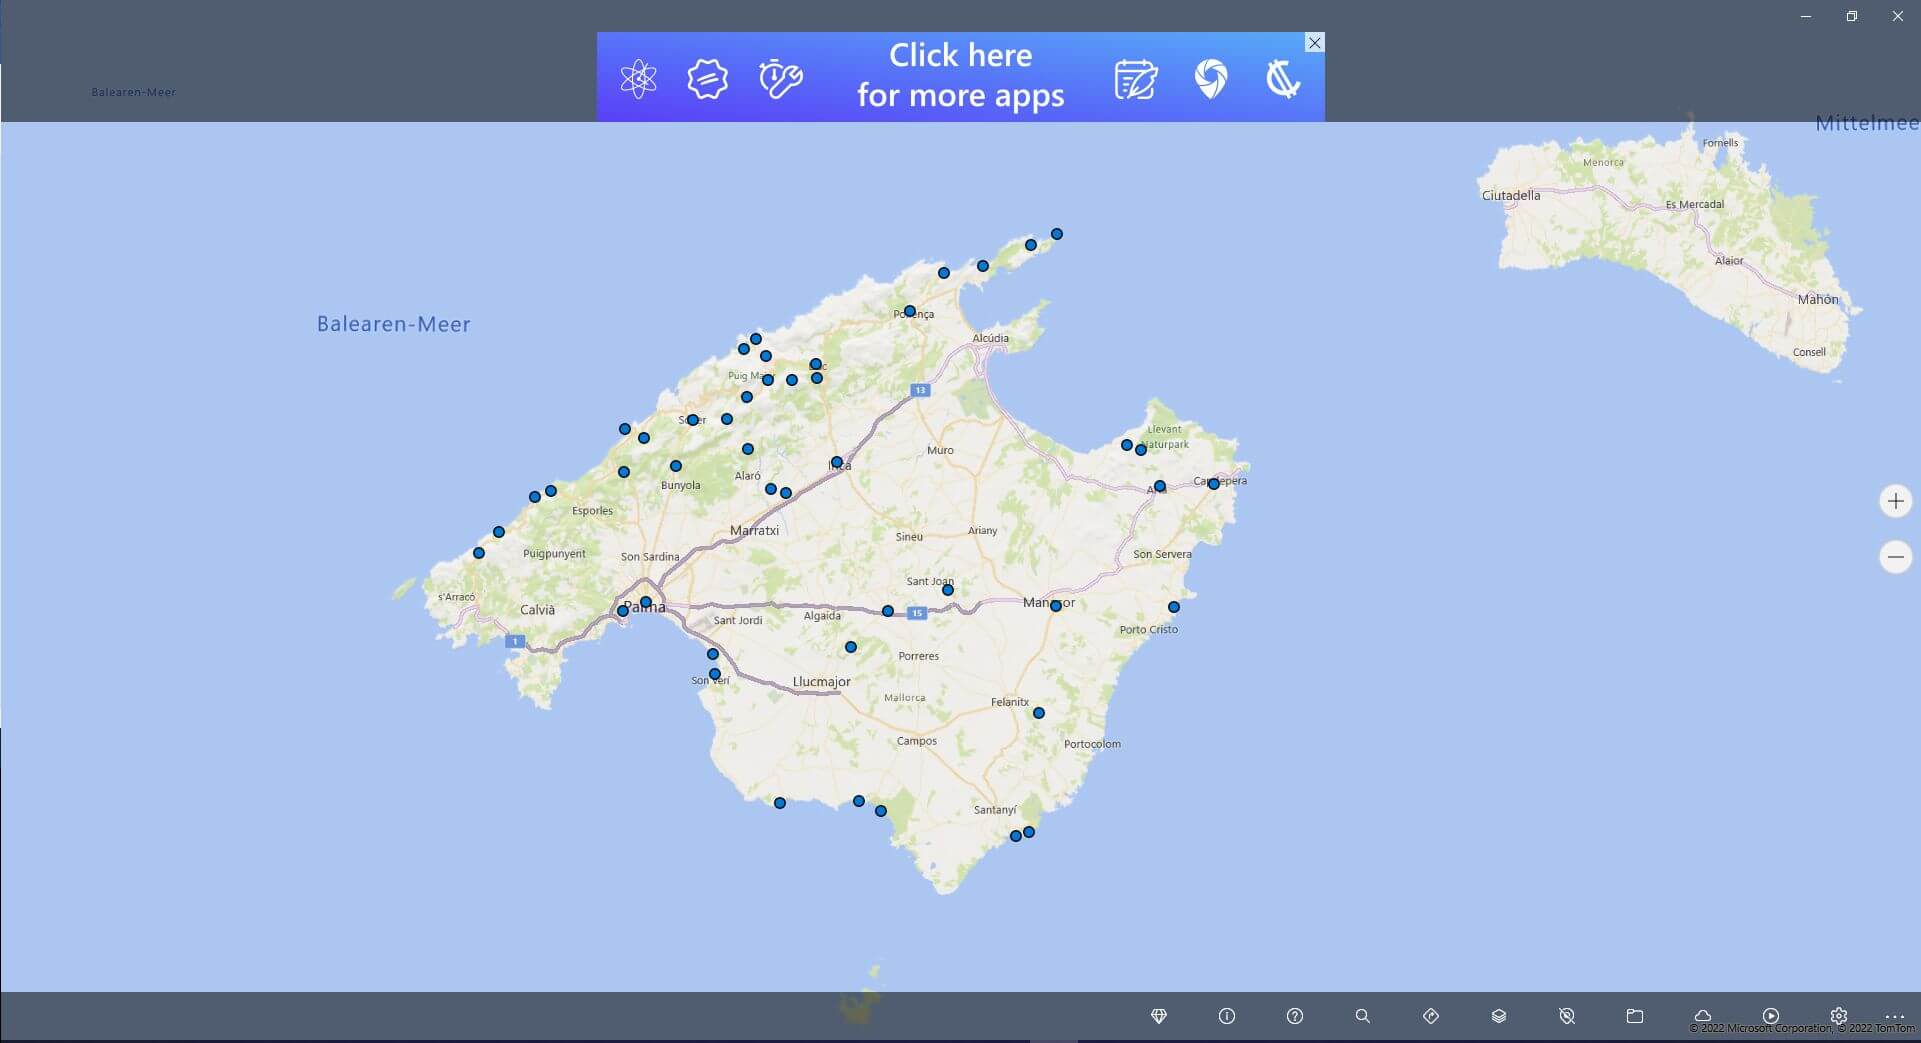
4. Load image capture locations onto a map using GeoPhoto
GeoPhoto is an app for Windows 10 or Windows 11. You can get it in the Microsoft Store, but the free version has ads. Without ads, the app is paid. To display all images on a map via GeoPhoto, proceed as follows:
- All images whose capture locations you want to see on a map should be gathered in a specific folder.
- Then click on the gear icon in GeoPhoto and select the folder with your image selection.
- A world map will then appear, and wherever the program detects GPS data in images, a circle/square with a thumbnail of the image will appear on the map.
Also, in the gear icon, you have the option to make the thumbnails square or round, large or small. A simple dot marker is also possible. In any case, you will have a map on which all your pictures are assigned to their shooting locations.
Cumbersome? Not really, but it's actually even simpler. Without advertising, without installation, and via drag & drop.
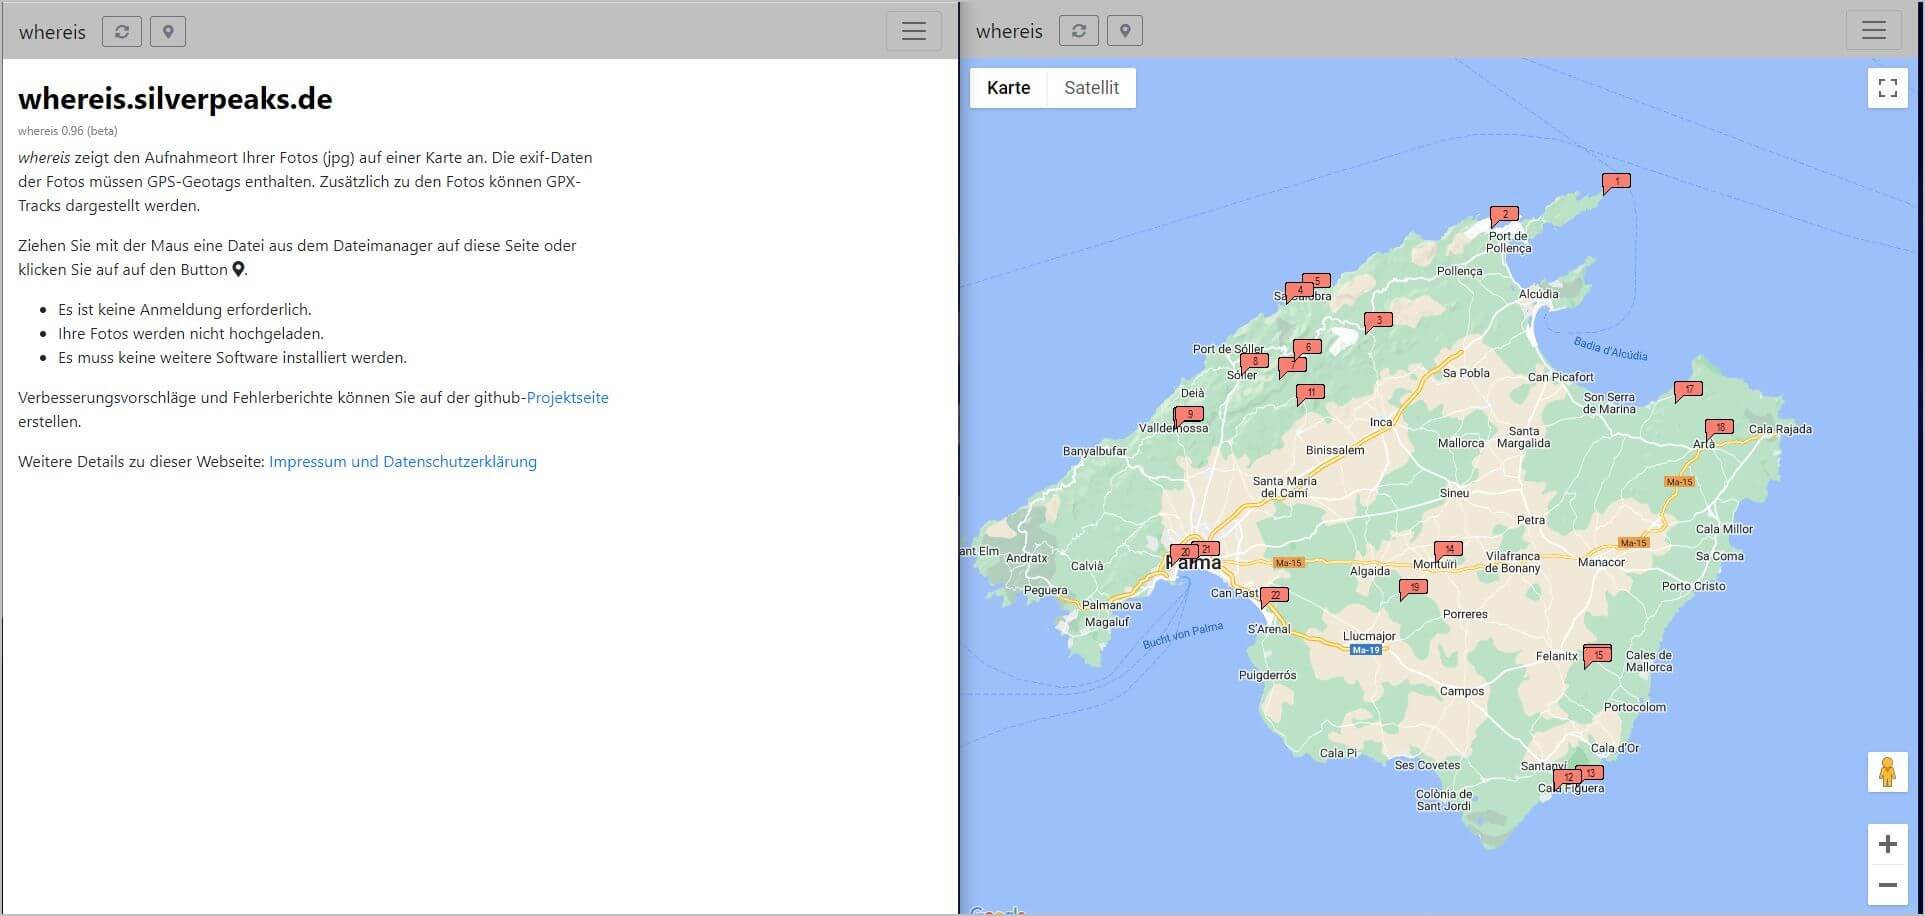
5. Drag & drop any photos onto https://whereis.silverpeaks.de/ and view them in Google Photos' map
This last option I'm showing you is, in my opinion, the easiest. You simply navigate to the URL mentioned above: https://whereis.silverpeaks.de/ and drag and drop any images onto this page. If you have dragged photos containing GPS data here, the view immediately changes to a map (Google Maps) and the shooting location of the image or images is displayed. If more images are to follow, simply drag and drop them onto the map again and the new photos will be added to the map: quickly and easily.
Conclusion:
In this blog post, I have shown you five ways to most easily and quickly read out the GPS information from your images. With the exception of option 1 – which is indeed very cumbersome – all methods are certainly well-suited to finding the shooting location of photos and displaying them on a map like Google Maps. And presumably there are even more programs – free and paid – with which you can achieve this goal. But so far, I haven't found anything that could top the simplicity of the site whereis.silverpeaks.de/.
Do you know of new tools or programs that are even easier, more intuitive, and faster? That show you your camera's photos on Google Maps? Please share your knowledge with us. Perhaps we will feature the tool in an upcoming blog post.


